

Try the pre-filters first. If your reverse osmosis system is running slow or the water tastes off, replace the sediment and carbon pre-filters before you touch the membrane. Let the tank refill fully, then re-test. If product water TDS or a salty taste persists after that, the membrane is the likely culprit. Record your system’s model and part numbers before you order anything.
TL;DR:
- Replacing sediment and carbon pre-filters every 6 to 12 months is crucial, especially in systems with high sediment load or untreated water sources.
- Persistent symptoms like rising TDS or salty tastes usually indicate membrane failure, but faulty pre-filters often cause flow and taste issues first.
- Proper diagnostic steps—replacing filters, flushing, and re-testing—prevent unnecessary membrane replacements and save costs.
- Record your system’s details before replacing parts to ensure correct fitment and optimal performance.
- Most reverse osmosis membranes last 2 to 3 years, but their lifespan depends heavily on pre-filter maintenance and feed water quality.
Table of Contents
- What each RO stage actually does
- How often should you replace pre-filters?
- When does the membrane actually need replacing?
- The troubleshooting sequence: front to back, one step at a time
- How do you physically replace pre-filters and the membrane?
- What details do you need before ordering parts?
- How do you monitor performance so you catch problems early?
- Why most homeowners replace the wrong part first
- Get the right parts or book a technician with Purewavewater
- Sources
- FAQ
What each RO stage actually does
A reverse osmosis system is not one part doing one job. It’s a sequence of stages, each catching something different, and confusing one stage’s job with another’s is the single biggest reason homeowners replace the wrong part.
Sediment filters sit first in line. They trap grit, rust flecks, and other visible particles before that debris can scratch or clog anything downstream. They’re mechanical, cheap, and usually the first thing to show wear because they’re doing the dirtiest job in the system.
Carbon pre-filters come next. Their main task is pulling chlorine and chloramine out of the feed water, along with some organic compounds that affect taste and odour. This matters more than it sounds: chlorine is hard on the thin-film membrane that comes after it, and a saturated carbon filter that lets chlorine through is one of the more common causes of premature membrane failure. NSF/ANSI 42 covers aesthetic effects like chlorine, taste, and odour reduction, which is the standard to check when you’re comparing carbon cartridge claims.
The RO membrane is the core of the system. It’s a semi-permeable barrier that rejects dissolved solids, most bacteria, and a wide range of other contaminants, letting purified water pass through while concentrating everything else into a reject stream. NSF/ANSI 58 is the standard specific to reverse osmosis systems and is worth checking on any membrane you’re considering. Reverse osmosis is not designed as a primary microbiological safety barrier, and it produces a concentrate stream at ratios that vary by system design, so don’t expect zero waste water regardless of setup.
Post-filters (sometimes called polishing filters) sit after the membrane, right before the faucet. They give the water a final taste pass, often with a small carbon cartridge, and they’re the least likely stage to cause a serious problem when they age.
Here’s how symptoms map to stages:
- Slow flow at the faucet, before checking anything else: usually a fouled sediment or carbon pre-filter
- Chlorine taste or smell coming through: a saturated carbon pre-filter, letting chlorine reach the membrane
- Rising TDS in the product water: almost always the membrane, not a pre-filter
- Flat or musty off-taste with normal flow: often the post-filter needs changing
How often should you replace pre-filters?
Sediment and carbon pre-filters typically need replacing every 6 to 12 months, though that window shrinks fast under certain conditions. Well water with visible sediment, high iron content, or heavy seasonal turbidity can clog a sediment filter in a matter of weeks rather than months. City water with moderate chlorine levels tends to sit at the longer end of that range.
Manufacturer guidance always overrides a generic calendar estimate, since housing size, cartridge micron rating, and system design all affect how fast a filter loads up.
Three signs mean you should stop waiting for the calendar and act now:
- Visible fouling. Pull the sediment cartridge and look at it. Brown, grey, or visibly caked material means it’s past due, regardless of how many months have passed.
- Sudden pressure or flow drop. If your RO faucet used to fill a glass in a reasonable time and now takes noticeably longer, a clogged pre-filter is the most likely and cheapest explanation.
- Chlorine taste at the RO faucet. This is a warning sign, not just an annoyance. It means the carbon filter is saturated and no longer protecting the membrane, and every extra day you run it this way shortens the membrane’s working life.
When any of these show up, the fix is straightforward: replace the sediment and carbon pre-filters, flush the system per the manufacturer’s instructions, let the storage tank refill completely, then taste and test the water again before assuming anything more expensive is wrong.
Pro Tip: Keep a spare set of pre-filters on hand if your water supply is inconsistent (private well, older municipal lines, seasonal turbidity). Reacting the day you notice a slowdown protects the membrane far better than waiting a week for a replacement to arrive.
When does the membrane actually need replacing?
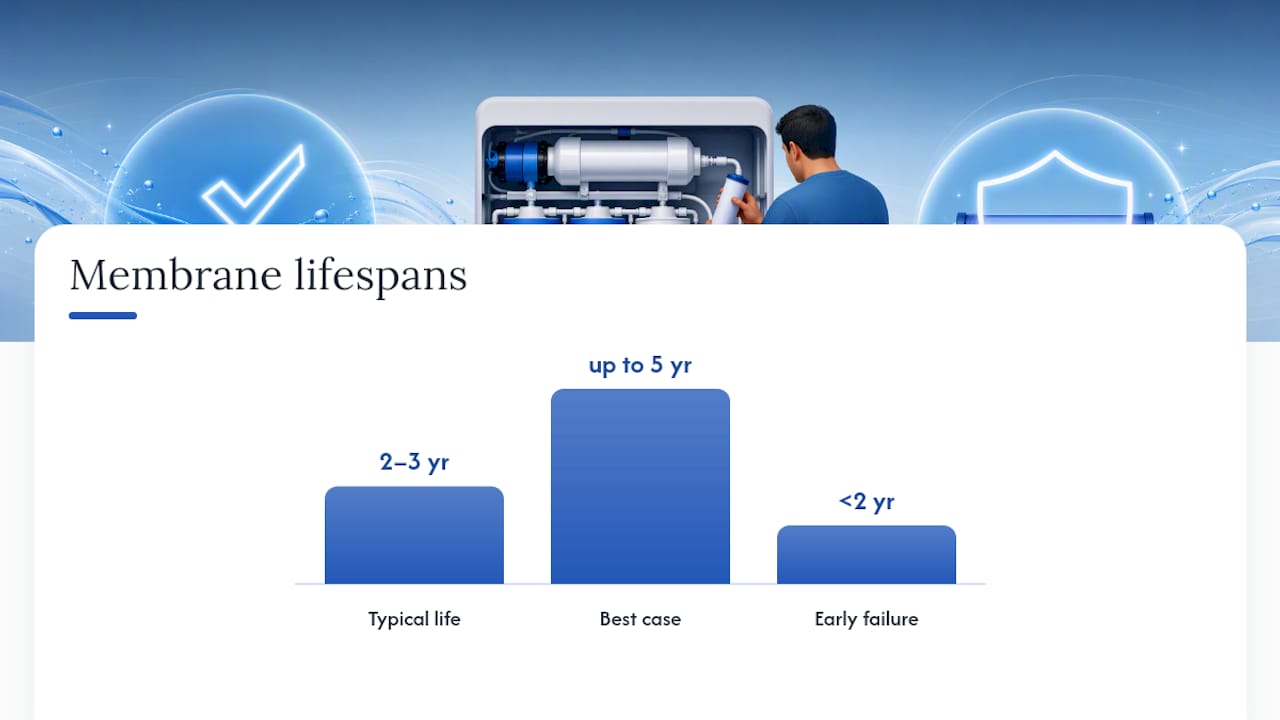
Membranes commonly last 2 to 3 years, sometimes stretching toward 5 years in systems with excellent pre-filter discipline and low feed water hardness, and sometimes failing well short of 2 years in systems where chlorine breakthrough or scale buildup went unaddressed. There’s no single number that applies to every installation, because membrane life depends heavily on how well the stages ahead of it were maintained.
The diagnostic signals that actually point to the membrane, rather than a pre-filter, are objective and testable:
- Rising product TDS. A basic TDS meter reading on the output water that keeps climbing over successive checks, even after fresh pre-filters, points squarely at declining membrane rejection.
- Falling rejection percentage. Rejection is calculated by comparing feed water TDS to product water TDS. A membrane in good condition typically rejects the large majority of dissolved solids; a meaningful, sustained drop in that percentage is a real failure signal.
- Persistent salty or mineral taste that doesn’t clear up after you’ve already swapped the pre-filters and re-tested.
- Unrecoverable flow loss. If flow stays poor even after fresh sediment and carbon cartridges and a full tank refill, the membrane itself may be fouled or scaled.
Membranes fail early for a handful of predictable reasons. Chlorine exposure from a saturated carbon pre-filter is one of the most common, since chlorine attacks the thin-film composite material membranes are built from. Ignored pre-filters generally are the other major cause, letting sediment and organics reach and coat the membrane surface. High hardness or high influent TDS accelerates scaling on the membrane, particularly in homes on well water or in hard-water regions.
Objective test, not a guess: Compare feed water TDS to product water TDS whenever you suspect the membrane. A widening gap between those two numbers, tracked over a few weeks, tells you more than any calendar date could.
The mitigation for most of these causes is pretreatment: a water softener ahead of the RO system reduces scaling risk, and staying disciplined about carbon pre-filter changes protects the membrane from chlorine damage in the first place.
The troubleshooting sequence: front to back, one step at a time
Homeowners frequently replace the membrane first because it feels like the “real” fix, then discover the problem was a $20 carbon cartridge all along. The correct order protects both your budget and your diagnostic clarity, because changing everything at once means you never learn what actually solved the problem.
- Record your system details before doing anything else. Write down the model number, the number of stages, the part number for each cartridge, the housing size, and the GPD (gallons per day) rating printed on the membrane or its housing. You’ll need every one of these details before ordering replacement parts.
- Replace the sediment filter, then the carbon pre-filter. Do these together since they’re usually due around the same time, but treat them as the first line of investigation, not the membrane.
- Flush the system and let the storage tank refill completely. This step gets skipped constantly, and skipping it produces misleading readings. A partially filled tank will give you a falsely low flow rate and can distort your TDS check.
- Re-test flow and TDS before concluding anything. Time how long it takes to fill a measured container at the faucet, and take a fresh TDS reading. Compare both to your baseline or to your last known good numbers.
- Only move to the membrane if problems persist. If flow is still poor or TDS is still climbing after a genuinely full tank and fresh pre-filters, the membrane is now the leading suspect, and you can order with confidence.
This sequence exists because changing one layer at a time preserves the diagnostic signal. Swap everything simultaneously and a working membrane gets discarded alongside a genuinely failed carbon filter, with no way to tell which one actually caused the symptom.
How do you physically replace pre-filters and the membrane?
Before you open any housing, gather what you need: the correct replacement cartridges or membrane (confirmed against your recorded part numbers), a bucket or towel for water spillage, disposable gloves, a filter wrench if your housings require one, and a TDS meter for before-and-after testing. None of this is optional if you want a result you can trust.
Safety first. Shut off the cold water supply valve feeding the RO system, and close the valve on the storage tank if your system has one. Open the RO faucet to relieve pressure in the lines before you open any housing. Skipping the depressurizing step is the most common reason people get an unexpected soaking mid-replacement.
Replacing pre-filters:
- With the water supply off and pressure relieved, use the filter wrench (or your hands, on many residential units) to unscrew each pre-filter housing.
- Remove the old cartridge and inspect it. This is your confirmation that a replacement was actually due.
- Rinse the housing with clean water and check the O-ring for cracking or flattening. A worn O-ring causes leaks even with a perfectly good new cartridge installed.
- Lightly lubricate the O-ring with food-grade silicone grease (check your manufacturer’s manual for their specific recommendation) and seat it properly before reassembly.
- Install the new cartridge, matching flow direction if the housing is marked, and hand-tighten the housing back on. Overtightening cracks housings; it doesn’t seal them any better.
- Turn the water supply back on slowly and check every fitting for drips.
- Open the RO faucet and let the system flush for the duration specified in your manual, typically several minutes, then let the storage tank refill fully before drinking or testing the water.
Replacing the membrane:
- Shut off the water supply and relieve pressure the same way as above.
- Locate the membrane housing, which is usually the largest cylindrical component in the system.
- Open the housing per your manufacturer’s instructions and slide out the old membrane. Note which end faced the feed water inlet.
- Insert the new membrane in the same orientation. Getting this backwards is a common mistake and will produce poor performance or no flow at all.
- Reassemble the housing, following any manufacturer guidance on sanitizing the housing interior before installing the new membrane, since bacterial buildup in an old housing can undermine a brand-new membrane’s performance.
- Restore water supply, flush per your manual’s instructions, and let the tank refill completely before testing TDS and rejection percentage again.
Pro Tip: Write the installation date directly on the new membrane or cartridge housing with a permanent marker. It sounds simple, but it’s the single easiest way to stop guessing later about how old a part actually is.
Call Purewavewater or a qualified technician if you’re dealing with a proprietary tankless system that doesn’t match standard housing sizes, if you have a leak you can’t trace after reassembly, or if you’ve replaced both pre-filters and the membrane and rejection performance still hasn’t recovered. At that point the issue may be a fitting, a check valve, or the storage tank bladder, and further parts-swapping without diagnosis just adds cost without answers.
Disposing of used filters and membranes. Used pre-filter cartridges and membranes generally go in household waste, since they’re not classified as hazardous material in most residential contexts. Check your local municipal waste guidelines if you’re unsure, particularly for larger commercial-style cartridges, and never dispose of them by flushing or pouring down a drain.
What details do you need before ordering parts?
Confirming the exact model before you buy is the difference between a five-minute swap and a returned part that doesn’t fit. Never assume universal compatibility: housing size, part numbers, and GPD rating all vary between manufacturers, and even between different product lines from the same manufacturer.
Before you order anything, record:
- System model and serial number, usually on a label on the main housing or storage tank
- Stage count (3-stage, 4-stage, 5-stage, or more), since this determines how many cartridges you actually need
- Part numbers for each individual cartridge and for the membrane itself, not just a general description
- Housing size, typically 10 inch or 20 inch for standard cartridge housings
- Membrane type and size, most commonly 1812 or 4040, referring to the membrane’s diameter and length in a coded format
- GPD (gallons per day) rating, which needs to match your original membrane’s output capacity for the system to perform as designed
Proprietary and tankless systems deserve extra caution. Some manufacturers design housings and membranes that only accept their own branded parts, and fitting an off-brand cartridge into one of these systems can mean a poor seal, reduced performance, or a voided warranty. If your system’s documentation doesn’t clearly list standard sizing, treat that as a signal to confirm compatibility directly with the manufacturer or a local technician before ordering.
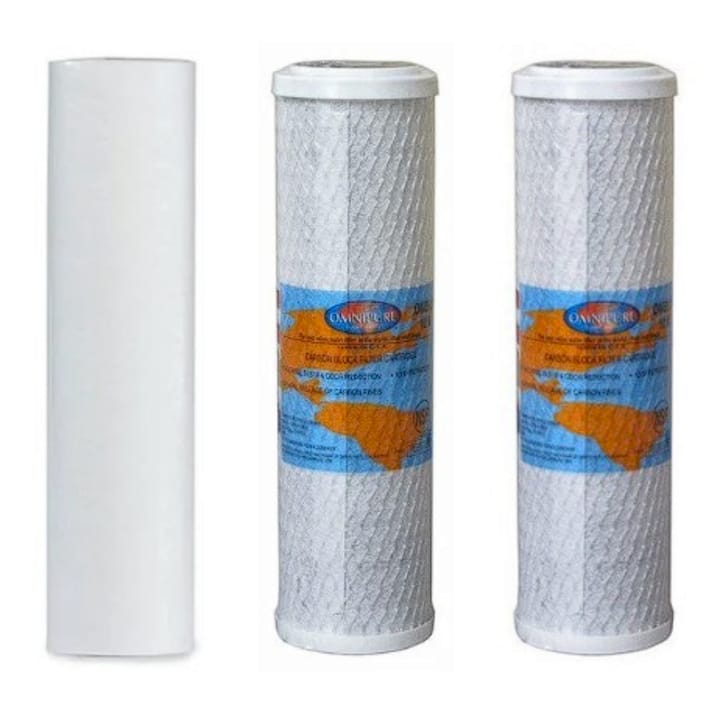
Checking for NSF/ANSI certification and clear fitment specs on any replacement part is the best defence against ending up with something that technically fits the housing but doesn’t perform to the original system’s specification. For homeowners running a standard multi-stage residential system, Purewavewater’s Reverse Osmosis 3 Pack Filters covers the common sediment and carbon pre-filter combination, but confirm your exact stage configuration and part numbers against your own system before adding it to your order.
How do you monitor performance so you catch problems early?
A cheap TDS meter and a five-minute monthly habit will tell you more about your system’s health than any calendar reminder. Test the feed water and the product water side by side, and write both numbers down.
Monthly spot checks are enough for most households. Measure feed water TDS, then product water TDS, and calculate rejection percentage by comparing the two. A membrane in good working order typically rejects the large majority of dissolved solids, and membrane replacement decisions should be based on that rejection trend over time, not on a fixed date on the calendar.
Keep a simple log, even a notebook by the sink works fine:
- Date of test, feed TDS, product TDS, calculated rejection percentage
- Date of each pre-filter change and which cartridges were swapped
- Date of membrane installation, so you always know its actual age
- Flow rate observations (how long to fill a measured container)
A gradual upward trend in product TDS over several months, even if each individual reading looks fine on its own, is often the earliest sign of membrane wear. Catching that trend early lets you plan a membrane replacement on your own schedule instead of reacting to a sudden taste complaint.
If your feed water runs consistently hard or carries elevated iron, adding a water softener or iron removal system ahead of the RO unit reduces scaling risk on the membrane substantially and is often the single most effective way to extend membrane life beyond the typical range.
Why most homeowners replace the wrong part first
Conventional wisdom treats the membrane like the engine of the system, the part that must be failing whenever something goes wrong. That instinct is understandable, but it’s usually backwards. The membrane is the most expensive part to replace and the least likely to be the actual cause of a flow or taste complaint on any given week.
The uncomfortable truth is that most RO complaints trace back to neglect further upstream, not membrane failure. A saturated carbon filter doesn’t just fail to remove chlorine, it actively lets that chlorine attack the membrane sitting right behind it. Homeowners who replace the membrane without first addressing a fouled pre-filter often find themselves right back where they started within months, because the thing that damaged the original membrane is still sitting there damaging the replacement.
What gets underestimated is how much diagnostic value there is in doing this slowly. Swapping pre-filters, waiting for a full tank refill, and re-testing before touching the membrane isn’t just cheaper. It’s the only sequence that actually tells you what was wrong in the first place. Skip that discipline and you’re not maintaining a water system anymore, you’re just replacing parts and hoping.
If there’s one thing worth taking from a decision-first approach to RO maintenance, it’s that testing beats guessing every time, and a $15 TDS meter will save homeowners more money over a system’s lifetime than any amount of premature membrane shopping.
— CloudSprout16
Get the right parts or book a technician with Purewavewater
Ordering the correct pre-filters shouldn’t require guesswork, and Purewavewater’s Reverse Osmosis 3 Pack Filters gives homeowners running a standard residential setup a straightforward way to get sediment and carbon replacements without hunting down individual part numbers online.
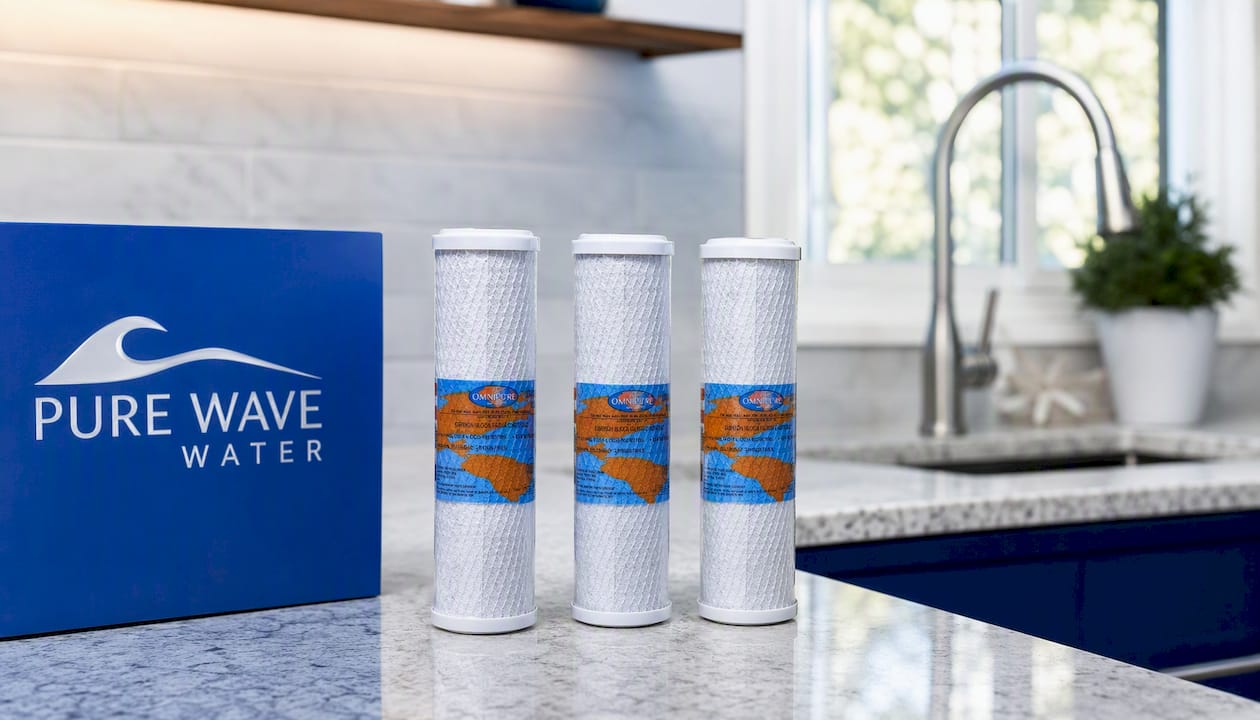
If your compatibility checklist raises questions, or your system turns out to be a proprietary or tankless design that doesn’t match standard housing sizes, water testing, treatment, and installation services have been available locally since 1995 in Georgetown, Ontario. In-store water testing for hardness, iron, and other concerns is offered at no cost, providing a useful next step if your TDS readings are climbing and you’re not sure whether a softener or pretreatment step would extend your membrane’s life. Confirm your exact model and part numbers against the checklist in this guide, then either order your replacement pre-filters directly or visit Purewavewater to book a water test and get a technician’s read on your specific system.
Sources
For readers who want to dig deeper into the standards and schedules referenced throughout this guide, the Canadian Drinking Water Guidelines cover what reverse osmosis systems are and are not designed to remove. Practical replacement scheduling and cartridge-versus-membrane troubleshooting logic is detailed in this breakdown of RO filter stages and this replacement schedule comparison. Always check your own system’s manufacturer documentation for model-specific instructions before ordering parts or attempting sanitization procedures.
- Reverse osmosis filter stages explained: what each cartridge does and when to replace it
- RO filter replacement schedule: prefilters vs membrane
- Reverse osmosis replacement filters: schedules, compatibility and guidance
FAQ
How often do RO membranes need to be replaced?
Most membranes need replacement every 2 to 3 years, though well-maintained systems with good pre-filter discipline can stretch closer to 5 years while neglected ones can fail sooner.
How long do RO membranes typically last?
Lifespan depends more on pre-filter maintenance and feed water quality than on a fixed timeline. Watch rejection percentage and product TDS rather than relying on the calendar alone.
What is a major downside of reverse osmosis water?
Reverse osmosis systems produce a concentrate (waste) stream alongside the purified water, and the ratio varies depending on the system’s design. RO also isn’t designed as a primary microbiological safety barrier on its own.
Is RO water hard on the kidneys?
There’s no credible evidence that properly functioning RO drinking water harms healthy kidneys; RO simply reduces dissolved solids and many contaminants from the water passing through the membrane.
Should I replace pre-filters or the membrane first?
Always replace the sediment and carbon pre-filters first, flush the system, let the tank refill fully, and re-test before considering a membrane replacement, since pre-filter neglect is the most common cause of the symptoms people blame on the membrane.

Written by the Pure Wave Water team, who test, install and service water treatment systems across Georgetown and Halton Hills.