

Most cases of a water softener not working come down to three things: the bypass valve is open, the salt has bridged or mushed in the tank, or the unit needs a manual regeneration to reset the cycle. Check those first, then confirm with a hardness test strip at a softened tap. If the reading still comes back above 3 grains per gallon after a manual regen, you’re likely looking at a mechanical fault that needs a closer look, possibly from a professional.
TL;DR:
- Most water softener failures are caused by a bypass valve left open, salt bridging or mushing in the tank, or the need for a manual regeneration.
- A hardness test strip should read no more than 1 grain per gallon after a regeneration; readings above 3 gpg indicate ineffective softening.
- Common issues like salt bridging or mushing are fixable with simple maintenance, such as breaking crusts or cleaning the tank, especially when pellets are used.
- Problems with brine draw systems often stem from clogged injectors, stuck floats, or kinked lines, which can frequently be cleared with DIY cleaning.
- Regular maintenance like checking salt weekly, re-testing water every six months, and ensuring the bypass valve is correctly positioned can prevent the majority of failures.
Table of Contents
- Signs your water softener isn’t working
- Confirming a water softener malfunction before you touch anything
- Salt bridging and salt mushing: the two most common culprits
- Brine draw problems: venturi, injector, and float issues
- Resin, control valve, and timer troubles: DIY or call a pro?
- Simple mistakes that mimic a broken softener
- When to call a professional and a maintenance routine that prevents most failures
- How Pure Wave Water resolves problems DIY checks can’t catch
- How water pressure problems throw off softener performance
- Why seasonal changes and water source shifts affect softening
- Long-term habits that keep failures from coming back
- Author perspective: common homeowner mistakes and practical shortcuts
- Get help from Pure Wave Water: testing, repair, and replacement parts
- Sources
Signs your water softener isn’t working
The clearest sign is hard water symptoms returning to your taps: white scale on faucets and shower heads, spotted dishes, and soap that doesn’t lather well. Some homeowners notice dry, itchy skin after showering. These are classic hard water symptoms, and they usually show up gradually rather than all at once, which is why a lot of people don’t catch the problem until it’s been going on for weeks.
The system itself often gives you clues before the water does. Watch for these behaviours in and around the unit:
- Salt level in the brine tank hasn’t dropped in weeks, even though the softener should be using it during regeneration
- Standing water sitting in the brine tank when there shouldn’t be any
- Grinding, humming, or clicking noises from the control valve that weren’t there before
- A hard, crusty layer of salt sitting above the water line in the tank
- The control head display frozen, blank, or flashing an error code
If you’re not sure which symptom to chase first, start with the salt tank. Bridging and mushing cause more service calls than any other single issue, and they’re the easiest to check without tools.
Confirming a water softener malfunction before you touch anything
Before you take anything apart, run through a short sequence that tells you whether you’re dealing with a real mechanical failure or something simpler.
- Test the water. Dip a hardness test strip into a glass filled from a tap downstream of the softener. Compare the colour to the chart on the box.
- Check the bypass valve. Make sure it’s turned to the “in service” position, not bypass, and confirm the unit has power.
- Inspect the salt tank. Look for a hard crust (bridging) or a thick sludge layer at the bottom (mushing), and note the water level.
- Run a manual regeneration. Most control heads have a regen button or dial. Trigger it and listen for water running into the tank, a pause, then a draw and drain cycle.
- Re-test after the cycle finishes. Fill a fresh glass from the same tap and check it against the strip again.
By the numbers: properly softened water should read 0 to 1 grains per gallon on a test strip. Anything above 3 gpg signals the softener isn’t doing its job, which is a useful line in the sand when you’re deciding whether the problem is minor or worth escalating.
This order matters because it moves from the least invasive check to the most revealing one. A lot of homeowners jump straight to taking the control head apart when the actual fault is a bypass valve someone bumped during a plumbing job. Verifying bypass position, power, and salt level before assuming a mechanical failure resolves more service calls than any repair guide wants to admit.
Salt bridging and salt mushing: the two most common culprits
Salt bridging happens when a hard crust forms above the water level in the brine tank, leaving an air gap underneath. The salt stops dissolving into brine, the softener can’t build the concentrated solution it needs for regeneration, and the resin never gets recharged. It looks solid, almost like a shelf of hardened salt sitting a few inches above the water.
Fixing it is straightforward, but do it carefully:
- Use a broom handle or a length of PVC pipe to gently press down and break up the crust. Never use a metal tool, since it can puncture or gouge the plastic tank.
- Work around the edges first, then break through the centre once the sides are loose.
- Remove any large chunks that won’t dissolve on their own so they don’t reform into another bridge.
- Run a manual regeneration once the crust is cleared so the system can build fresh brine.
Salt mushing is different: instead of a hard crust, you get a thick, wet sludge at the bottom of the tank, usually from low-quality salt or excess moisture. Scoop out the sludge, rinse the tank with a hose, and let it dry before refilling.
Pro Tip: Switch to a pellet salt rather than crystal or block salt. Pellets dissolve more evenly and dramatically cut down how often bridging and mushing come back. Windsor Pure Natural Water Softener Salt is a solid pellet option if you’re restocking.
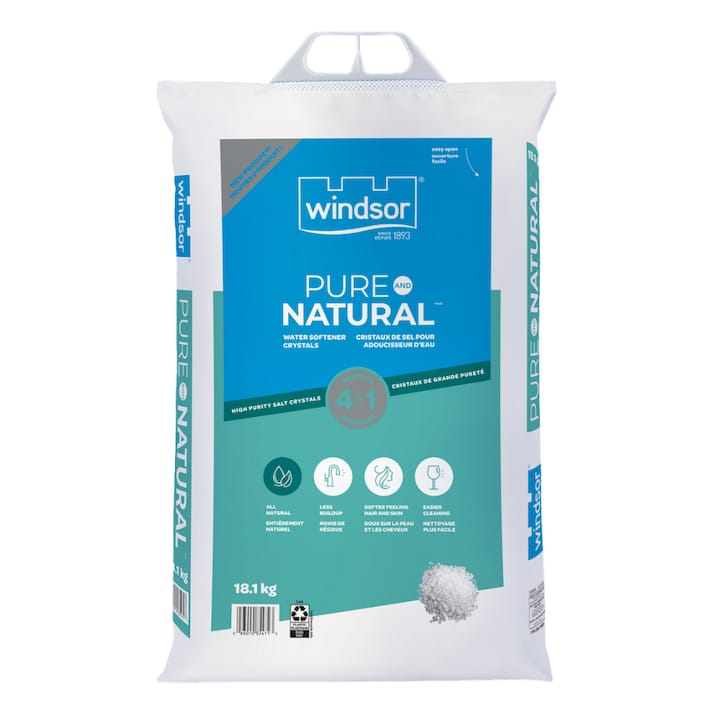
Once you’ve cleared the crust or sludge and run a regen cycle, expect softened water within a day, sometimes within a few hours if your household uses water regularly.
Brine draw problems: venturi, injector, and float issues
If salt levels look fine and there’s no bridging, the next suspect is the brine draw system. This is the small mechanical assembly that pulls concentrated brine out of the tank and into the resin bed during regeneration.
- Locate and remove the venturi/injector, usually a small plastic nozzle assembly near the top of the control valve. Soak it in white vinegar or a CLR solution for 30 to 60 minutes to dissolve mineral buildup, then inspect the O-rings for cracks.
- Check the float assembly inside the brine tank. Mineral scale can jam it in one position, which either stops brine draw entirely or lets too much water into the tank. Clean it gently or replace it if it’s cracked.
- Inspect the brine line and drain hose for kinks, clogs, or, in colder installations, a frozen section. A pinched line is an easy miss during a quick visual check.
- Run another manual regeneration once everything is reassembled. You should hear a steady suction sound as brine gets pulled from the tank, followed by normal drain flow.
Cleaning a clogged venturi is one of the higher-payoff repairs in this whole process: it’s a fifteen-minute job that restores brine draw in a large share of cases where salt levels looked completely normal.
Resin, control valve, and timer troubles: DIY or call a pro?
Resin beads are what actually exchange hardness minerals for sodium, and they wear out or foul over time. Fouling from iron or sediment shows up as gradually weaker softening even right after a regen cycle, sometimes with a rust tint in the water. Light fouling responds to a commercial resin cleaner run through the brine tank; heavy iron fouling usually needs repeated treatments or, past a certain point, a full resin replacement.
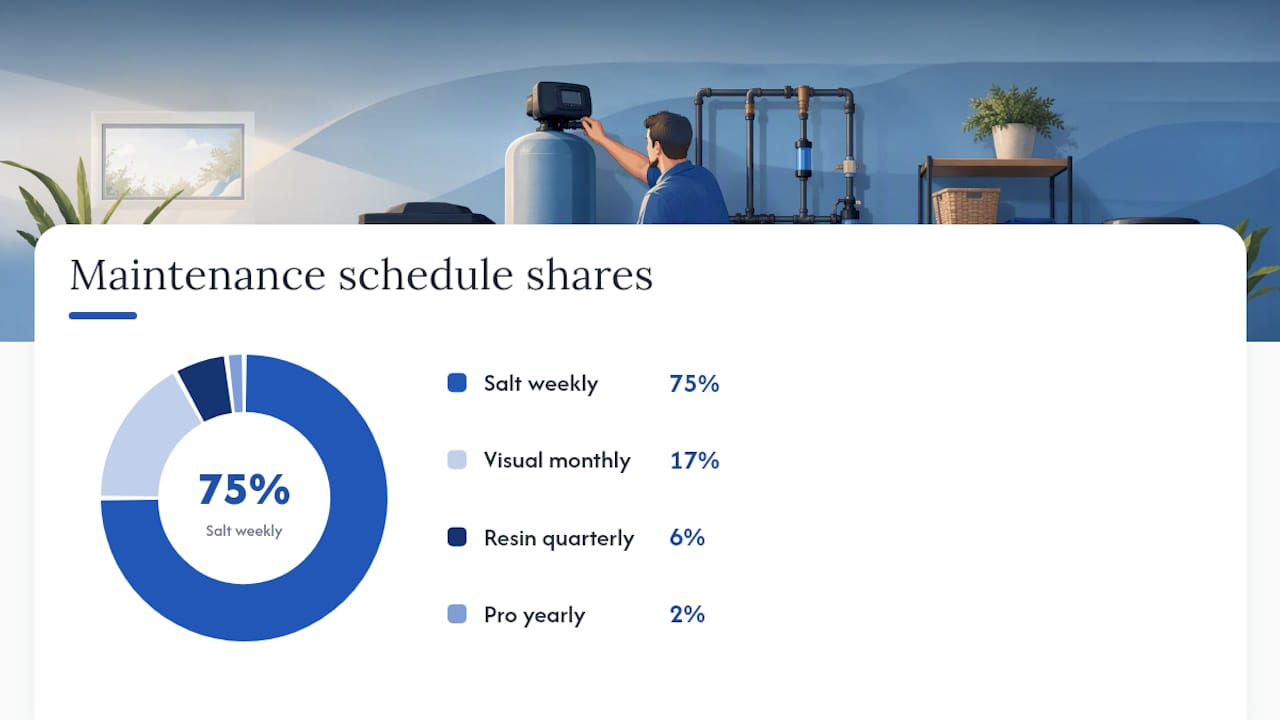
By the numbers: a consistent weekly and monthly maintenance routine prevents roughly 80% of the failures homeowners eventually call a technician about, according to combined guidance from several troubleshooting resources. That’s a strong argument for catching resin issues early rather than waiting for a full breakdown.
Control head problems are a separate category. Work through these before assuming the electronics are dead:
- Check that the time-of-day display is accurate. A power outage can reset it and throw off the regen schedule.
- Replace the backup battery if the unit has one and the display is dim or blank.
- Look up any flashing error code in your model’s manual. Most codes point to a specific fault, like a motor stall or a missed regen, rather than total failure.
- Try a full reset by unplugging the unit for a minute before plugging it back in.
If the motor, drive gear, or main valve itself has failed, weigh the repair cost against a replacement. On older units, a new control valve motor can run close to the cost of a new mid-range softener, which tips the math toward replacing rather than repairing.
Simple mistakes that mimic a broken softener
A surprising number of “broken” softeners aren’t broken at all. Recent plumbing work is the biggest culprit: a plumber or DIY repair job routes water through a bypass loop and forgets to switch it back, so your fixtures are pulling hard water straight from the supply line while the softener sits idle.
Run through these before troubleshooting anything mechanical:
- Confirm the bypass valve is fully in the “service” position, not partway or fully open
- Check the hardness setting programmed into the control head matches your actual water hardness
- Verify the regeneration schedule and time-of-day setting are both correct
- Check the power outlet and any GFCI breaker it’s wired through, since a tripped GFCI cuts power without any obvious sign
- Confirm the backup battery (if equipped) is holding a charge so settings survive a power blip
Operational errors like a bypass valve left open after plumbing work explain a large share of “broken softener” calls that turn out to need no repair at all. Make this checklist a habit any time a plumber has been in your basement or utility room.
When to call a professional and a maintenance routine that prevents most failures
Some problems are worth handling yourself, and some genuinely aren’t. Call a professional right away for any of the following:
- Visible leaks around the control valve, bypass fittings, or a cracked brine or resin tank
- Recurring control head failures after a reset and battery replacement, which usually points to a failing circuit board
- Persistent hardness readings above 3 gpg after you’ve broken a salt bridge, cleaned the venturi, and run multiple regen cycles
- Unusual water discolouration alongside softening failure, which can mean iron or sediment fouling the resin bed
A diagnostic visit typically includes a water hardness and iron test, a physical inspection of the tank, valve, and resin bed, and a written quote before any repair work starts. Pricing depends on what’s actually wrong. Cleaning an injector costs far less than replacing a control valve motor or the resin bed itself.
Pro Tip: Stick to a simple routine: check salt weekly, do a visual inspection monthly, run a resin cleaner quarterly if you have iron in your water, and book a professional inspection once a year. That schedule alone prevents the majority of failures homeowners otherwise deal with reactively.
How Pure Wave Water resolves problems DIY checks can’t catch
When you’ve broken the salt bridge, cleaned the injector, and run a manual regen and the water still tests hard, the next step is a proper diagnosis, not another guess. Pure Wave Water offers free in-store testing for hardness and iron, which catches contaminants that a basic test strip often misses, particularly iron and manganese that quietly foul resin beads over months.
Local technicians can run a full resin and control head diagnostic on-site, something that’s genuinely hard to do accurately without the right equipment. Professional testing catches combined contaminant issues that homeowner test kits routinely miss, which matters if your hardness reading looks fine but softening performance still feels off. If your DIY checklist hasn’t solved the problem, booking a test and inspection is a faster path than working through repair guesses one at a time.
How water pressure problems throw off softener performance
Low water pressure and softener performance are more connected than most homeowners expect. A softener needs a minimum flow rate to properly cycle brine through the resin bed during regeneration. When incoming pressure drops, usually from a failing pressure tank, a partially closed valve somewhere in the line, or municipal supply issues, the regeneration cycle can run without enough force to fully rinse and recharge the resin.
The opposite problem causes damage rather than incomplete cycles. Pressure that’s consistently too high, generally above 80 psi, puts stress on internal valve components and seals, which shortens the lifespan of the control valve and increases the odds of a leak developing at a fitting.
There’s also a simpler, more common issue: if your home’s pressure fluctuates a lot, say from a well pump cycling or multiple fixtures running at once, a softener can misread flow during regeneration and cut the cycle short. This shows up as inconsistent softening. Some days the water tests fine, other days it doesn’t, with no changes to salt or settings in between.
If you suspect pressure is the underlying issue, a pressure gauge that threads onto an outdoor spigot gives you a quick baseline reading. Anything consistently below 40 psi or above 80 psi is worth investigating on its own, separate from anything going on inside the softener itself.
Why seasonal changes and water source shifts affect softening
Water softeners don’t operate in a vacuum. Groundwater hardness shifts with the seasons, particularly for homes on wells, and a softener programmed for last year’s hardness level can fall behind without any mechanical fault at all.
Spring runoff and heavy rain events often dilute well water temporarily, lowering hardness for a few weeks. Late summer and winter, when groundwater levels drop and mineral concentration rises, tend to push hardness higher. If your softener’s hardness setting was dialled in during a lower-hardness stretch, it may under-regenerate once mineral content climbs back up, using less salt than the water actually calls for.
Municipal water sources shift too, sometimes with almost no notice to residents. A city switching supply sources, blending in water from a different reservoir, or adjusting treatment upstream can change hardness levels enough to catch a softener off guard. This is one of the more overlooked causes of a softener that “suddenly” stopped working. Nothing changed at home. The water changed instead.
The fix is simple even if it’s easy to forget: re-test your water hardness twice a year, especially if you’re on a well or your municipality has made any changes to its supply. Adjust the hardness setting on the control head to match what you actually measure, rather than relying on a setting from the original installation.
Long-term habits that keep failures from coming back
Most of the failures covered in this guide share a common thread: they build up slowly and go unnoticed until softening performance visibly drops. A handful of habits keep that from happening.
Keep the brine tank at least a quarter full at all times, and avoid letting it run completely dry, since an empty tank is one of the fastest paths to a bridging or mushing cycle. Stick with pellet salt rather than crystal or block salt for day-to-day refills; pellets dissolve more evenly and leave less residue behind. Windsor Clean & Protect Water Softener Salt is worth considering if your well water carries iron, since it’s formulated to help resin resist the buildup that causes fouling.
Re-test your water hardness every six months rather than waiting for symptoms to show up. A five-minute test strip catches a drifting hardness setting long before scale reappears on your fixtures. Pair that with the quarterly and annual maintenance routine covered earlier, and you’re addressing the two biggest long-term threats: resin fouling and a hardness setting that no longer matches your actual water.
Finally, keep a simple log of salt refills and regeneration dates. If you notice salt use dropping off with no change in household water use, that’s often the earliest sign of trouble, well before test strips or visible scale confirm anything.
Author perspective: common homeowner mistakes and practical shortcuts
The mistake I see repeated most often is homeowners assuming a frozen control head display means the whole unit is dead, when it’s almost always a dead backup battery or a bridged salt tank underneath. People order replacement parts, sometimes a whole new softener, before they’ve broken up the crust in the brine tank or swapped a $10 battery. Test the water first. Break the bridge first. Buy parts last.
— CloudSprout16
Get help from Pure Wave Water: testing, repair, and replacement parts
If you’ve worked through the checks in this guide and your water is still testing hard, or you’d rather skip the troubleshooting and get a straight answer, Pure Wave Water gives you a faster path than guessing your way through repairs. Free in-store hardness and iron testing tells you exactly what’s happening in your water before you spend money on parts you might not need.
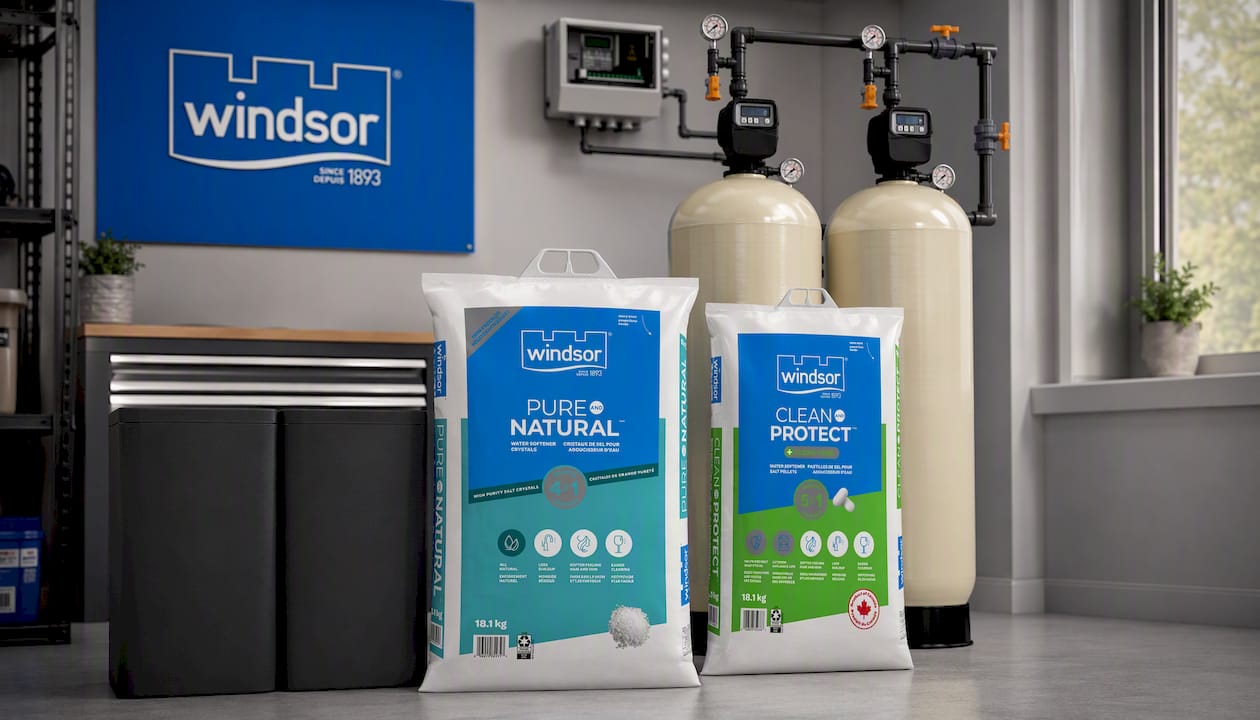
For salt-related issues, Windsor Pure Natural Water Softener Salt and Windsor Clean & Protect Water Softener Salt are both available for pickup, the second one built specifically to help resin resist iron fouling in well water. If your diagnosis points to a worn-out resin bed or a control valve that’s not worth repairing, the
75K Progressive Duplex Water Softener is a practical upgrade path for larger households.
Local technicians can also handle the repair side directly, whether that’s a venturi cleaning, a control head replacement, or a full system swap. Book a free water test or a repair inspection through Pure Wave Water to get a clear answer instead of another round of guesswork.
Sources
The troubleshooting steps and error code guidance in this article draw on a handful of trusted technical sources. HardWaterHQ’s common problems guide covers salt bridging fixes and maintenance schedules in detail. InspectApedia’s diagnostic reference walks through operational checks before assuming mechanical failure. WaterWorld’s explainer on soft water texture clarifies why softened water sometimes feels slippery, which helps avoid a false diagnosis.

Written by the Pure Wave Water team, who test, install and service water treatment systems across Georgetown and Halton Hills.