
A leaking reverse osmosis faucet almost always has one of four causes, and you can tell which one by looking at where the water appears. Water dripping from the spout or handle points to a worn faucet cartridge. Water from the small hole or slot at the base points to a blocked or badly routed drain line. Water at a filter housing points to an O-ring. Water at a tube joint points to a poorly seated or damaged tube end. Each fix is different, and guessing wastes time and sometimes makes the leak worse.
This guide walks you through each case in the order a technician would check them, explains what is safe to do yourself, and tells you when a leak means you should stop and call for help.
TL;DR
- Work out exactly where the water emerges before touching anything: spout or handle, air gap slot, filter head, tube joint, or the faucet base on a new install.
- A drip from the spout or handle usually means the faucet cartridge has failed. A leak from the air gap slot usually means the drain line is blocked, kinked or looped.
- Never plug, seal or bypass the air gap. It protects your drinking water from sink-drain backflow.
- Shut off the feed and relieve pressure first. If a fitting still leaks, replace the O-ring, collet or fitting instead of tightening it again.
- A new system that leaks at the faucet base should be shut off and reported to whoever installed it.
Table of Contents
- Start by locating the leak
- Water coming from the air gap hole
- Spout dripping or handle leaking
- Leaks at filter housings and cartridges
- Leaks at tubing connections
- A new system leaking at the faucet base
- Replacing a faucet or system: what to confirm
- Our perspective: a leak is information, not just a nuisance
- Need a hand with the repair?
- If you are on a private well
- When to stop and call a technician
- FAQ
- Sources
Start by locating the leak
The most useful question is not “is my RO faucet leaking?” but “where is the water coming from?” Dry the area with a towel, put a sheet of paper towel under the cabinet floor and the faucet base, run the system for a few minutes, and watch. The table below summarizes what each location usually means.
| Where the water appears | Most likely cause | What to do |
|---|---|---|
| Spout drips while closed, or handle weeps | Worn faucet cartridge | Replace the cartridge, or the faucet if parts are unavailable |
| Small hole or slot at faucet base | Blocked, kinked or looped drain line, or missing flow control | Shut off the feed and clear or re-route the drain tube |
| Around a filter housing or cartridge | Dirty, nicked or displaced O-ring | Depressurize, inspect and replace the O-ring |
| At a push-in tube connection | Damaged, crimped or angled tube end | Cut a clean square end and reseat it fully |
| Faucet base on a brand-new system | Installation error | Shut off and contact the installer |
| Your regular kitchen faucet | A separate faucet problem | Repair that faucet; it does not by itself mean the RO unit is leaking |
That last row matters more than it looks. A leak from the ordinary kitchen faucet is generally a separate fault, and manufacturer troubleshooting guidance treats it as unrelated to the under-sink system.
Before you open anything
Two habits prevent most of the mess:
- Close the feed valve that supplies the RO unit (the small valve on the cold line under the sink) and close the tank valve.
- Open the RO faucet briefly to let the stored water and pressure drain off before you remove any part.
If the feed valve itself is stiff, weeping or corroded, replacing it is often cheaper than fighting it. A 3/8-inch angle stop valve is the type many RO setups use to isolate the system.
Water coming from the air gap hole
Many RO faucets are air gap faucets. Look at the base of the spout and you will see a small hole or slot. That opening is deliberate. It breaks the connection between the RO drain line and your sink drain so that dirty sink water cannot siphon back toward your filters. When everything works, no water comes out of it. Manufacturer guidance on air gap hole leaks states plainly that water should not leak from that hole during normal operation.
When it does, the wastewater from the membrane has nowhere to go, so it climbs back up the drain tube and escapes at the weakest point: the air gap.
What to check
- Shut off the feed to the RO unit.
- Follow the drain tube from the faucet base to where it joins the sink drain. This line is commonly 3/8 inch.
- Look for kinks, loops and low spots. The tube must slope continuously downhill toward the drain. A sag that holds water, or a loop that traps air, blocks flow.
- Check the drain connection. Debris, grease or a clogged saddle clamp opening can restrict flow. Inspect the connection at the drain or garbage disposal inlet as well.
- Confirm a flow control is present. Manufacturer guidance lists a missing flow-control insert among the common causes of hissing, gurgling and air gap leakage, along with debris and kinked or looped tubing.
If you hear gurgling or hissing, that is the same problem announcing itself earlier. A related check from University of Nevada guidance: within about 15 minutes of opening the feed, you should hear wastewater trickling into the drain. If you hear nothing, the wastewater line is blocked or incorrectly positioned.
What not to do
Do not cap, plug or caulk the air gap hole to stop the drip. It will stop the water, but it removes the protection the faucet was designed to provide, and the pressure backs up into the system. Fix the drain path instead.
If you have disposal or dishwasher connections nearby, make sure the RO drain saddle sits above the trap and that the tube is not pinched by cabinet doors, stored items or the disposal itself.
Spout dripping or handle leaking
If the RO faucet drips from the spout or weeps around the handle when closed, the faucet cartridge has most likely worn out. Repair guidance for RO faucets says this symptom indicates the cartridge needs replacing.
RO faucets spend their lives under line pressure from a storage tank, and the small seals inside wear faster than you might expect, particularly where water is hard or has sediment. If you also see white crusting around the faucet, our guide to soap scum and what 200 mg/L hardness means explains how hardness shows up around the house.
Cartridge or whole faucet?
- Replace the cartridge if your faucet model is serviceable and the part is available. This is the cheaper fix and usually takes minutes.
- Replace the faucet if the cartridge is unavailable, the body is pitted or corroded, or the assembly is generally worn.
Some older faucets have an adjustment on the spout holder. A widely read home forum answer describes lifting the spout out of its holder and turning a brass-headed adjustment half a turn counterclockwise, then reinstalling. That can help on certain designs, but follow the instructions for your faucet rather than assuming yours has one.
When shopping for a replacement, match three things: the mounting hole size in your sink or counter, whether the faucet is air gap or non-air gap, and the tube connection size. Our shop carries the Smart Purifier™ Plus RO faucet in chrome and in brushed nickel, so you can match your kitchen’s finish.
Leaks at filter housings and cartridges
Water pooling around a filter head or cartridge usually means the O-ring is dirty, damaged or sitting out of its groove. The correct sequence matters:
- Close the feed and relieve pressure by opening the RO faucet.
- Unscrew the housing and take out the O-ring.
- Check for dirt, flat spots, nicks or twisting. Wipe the groove clean.
- Replace the O-ring if there is any damage, and lightly lubricate it with a food-safe silicone lubricant (not petroleum jelly, which can swell some rubber).
- Reassemble hand-tight, then restore water slowly and watch for a few minutes.
Manufacturer troubleshooting says that if leakage continues, replace the O-ring, collet or damaged fitting, not keep tightening. Overtightening plastic housings cracks threads and creates a bigger problem than the one you began with.
This is also a good moment to check your filter schedule. Overdue cartridges are harder to remove, seat poorly, and can distort seals. If you are not sure when each stage was last changed, write the date on the new cartridge when you swap it.
Leaks at tubing connections
Push-in (quick-connect) fittings are reliable when the tube end is clean and square. They leak when the tube is crimped, scratched, or cut at an angle. The fix, as laid out in troubleshooting steps for RO tubing:
- Shut off the feed and relieve pressure.
- Press in the collet and pull the tube out.
- Trim about 1/2 inch (13 mm) from the end with a sharp tube cutter, so the cut is square and the surface is smooth.
- Push the tube all the way into the fitting until it seats, then tug gently to confirm it holds.
- Restore water and check.
A utility knife or scissors tends to leave an oval, crushed end, which is why tubes that were “fixed” with them often drip again. If a threaded fitting leaks, do not crank it. Back it off, inspect the thread tape or sealing washer, and reseat it.
If the fitting itself is cracked or the collet is chewed up, replace it. These parts are inexpensive compared with water damage to a cabinet.
A new system leaking at the faucet base
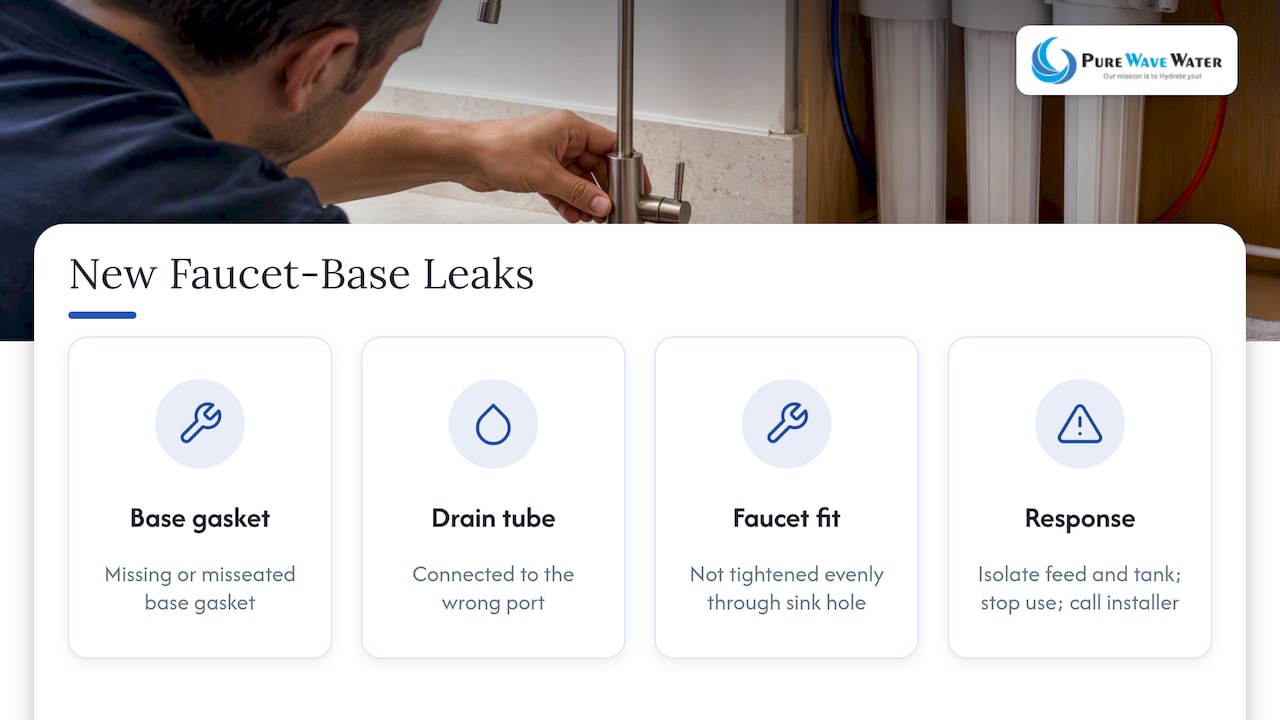
If the system is brand new and water appears at the faucet base, shut off the feed and the tank, stop using the system, and contact the installer. Manufacturer guidance on new systems that leak notes that incorrect installation is a common cause. Typical culprits are a missing or misseated base gasket, a drain tube connected to the wrong port, or a faucet not tightened evenly through the sink hole.
On an older system, the same symptom often traces back to a gravity drain line that has gradually clogged. The sequence is the same: isolate the system, relieve pressure, then clear the obstruction.
Replacing a faucet or system: what to confirm
When a repair is no longer worth it, check the replacement against the manufacturer’s compatibility instructions. In Canada, Health Canada’s guidance on drinking water treatment devices lists NSF/ANSI 58 as the standard for reverse osmosis drinking water systems and stresses that maintenance is necessary for the device to keep working as intended. Two practical points follow:
- A certification mark confirms only the performance claims covered by the standard. Read the specific contaminant-reduction claim on the box, not just the logo.
- Health Canada does not endorse specific brands, so compare claims, not marketing.
A faucet swap does not change the system’s certification by itself, but mixing parts from different makers can create fit problems. If you are unsure, ask before buying.
Our perspective: a leak is information, not just a nuisance
We see the same pattern again and again at the counter: someone replaces a faucet, the leak returns, and the real cause was the drain line or a tube that was never cut square. That is why we start with where the water is and not with what part to sell. It is also why our approach to water testing is free and in-store: we would rather tell you what your water needs than sell you something you do not.
A leaking RO faucet is also a reasonable prompt to look at the whole setup. If cartridges are overdue, if the membrane has never been changed, or if hardness or iron in your water is shortening the life of seals and cartridges, the leak is a symptom of a bigger maintenance picture. Bring a sample and we will test hardness, iron and other concerns, then recommend only what is actually needed. Our technicians service systems we sell and most major brands, and we give written quotes.
— CloudSprout16
Need a hand with the repair?
If you would rather not work under the sink yourself, our local technicians handle diagnosis, repair, maintenance and replacement for homes and businesses in Georgetown and Halton Hills. See our installation and repair services, or browse replacement filters, housings and RO parts in our shop if you already know what you need. For a water test, visit us in Georgetown.
If you are on a private well
A leak on a well-fed RO system is a repair task, not a verdict on your water. Still, it is a sensible time to check the source. Health Canada advises regular testing of individual water supplies and recommends qualified advice and certified treatment equipment. If your water has a rotten-egg smell, see our page on testing and isolating sulfur smell. If you have never tested for bacteria, read about coliform in well water, and for agricultural areas, nitrates in well water.
Until the leak is fixed, and especially if the unit treats well water, do not assume the water coming out of a compromised system is performing as certified. Keep a supply of tested drinking water on hand while you repair it.
When to stop and call a technician
Call someone if any of these apply:
- Water is spraying or running continuously even after you shut the feed valve.
- The feed valve will not close.
- The cabinet floor is swollen or you see mould, which suggests the leak has been going on for a while.
- A new installation leaks at the base.
- You have replaced an O-ring or tube end and the same fitting still leaks.
- The drain line is clear and sloped properly but the air gap still discharges water.
FAQ
Why is my RO faucet dripping from the spout?
A drip from the spout while the faucet is closed usually means the faucet cartridge is worn. Replace the cartridge if your model allows it, or replace the faucet if parts are unavailable or the body is worn. Check first that the drip is not coming from your regular kitchen faucet, which is a separate issue.
Why is water coming out of the air gap hole?
The drain line is almost always restricted: kinked, looped, sagging, clogged at the drain connection, or missing its flow control. Wastewater has to back up somewhere, and the air gap is the exit. Shut off the feed, clear the line and make sure it slopes continuously downhill.
Can I seal the air gap to stop the leak?
No. The air gap prevents sink-drain water from siphoning back into your RO system, so plugging or caulking it removes a safety feature and doesn’t fix the cause. Repair the drain path instead.
Why is my RO system hissing or gurgling?
Those noises usually come from the same drain-line problems that cause air gap leaks: debris, a kink or loop, or a missing flow control insert. Check the drain tube and connection. You should hear wastewater trickling into the drain within about 15 minutes of opening the feed.
How do I stop a leaking tube connection?
Shut off the feed, relieve pressure, press the collet and pull the tube out. Cut about 1/2 inch (13 mm) from the end with a sharp tube cutter and push it fully back in. If it still leaks, replace the fitting or collet instead of tightening it.
Sources
- Air gap hole leaking, reverse osmosis system
- Reverse osmosis leaking, troubleshooting
- Kitchen faucets: reverse osmosis leaking issues
- Reverse osmosis leaking issues repair guide
- Questions and answers on drinking water treatment devices, Health Canada
Recommended

Pure Wave Water shares educational content about water treatment, water softeners, reverse osmosis systems, UV purification, and filtration solutions. Our guides help readers understand water quality concerns, explore treatment options, and make informed decisions about their water treatment needs.