

Replace sediment and carbon pre-filters every 6 to 12 months, the post-filter annually, and the RO membrane every 24 to 36 months. Most under-sink swaps take 20 to 30 minutes and require no plumber. Parts including 3-pack filter sets, a 75 GPD membrane, and a full Vectapure 360 pack are commonly stocked to help match RO systems without guessing at part numbers.
TL;DR:
- Replace sediment and carbon pre-filters every 6 to 12 months, the post-filter annually, and the membrane every 24 to 36 months, with shorter intervals possible for well water.
- Confirm cartridge size by checking the label on existing filters or system documentation, focusing on standard sizes like 2.5"x10", 2.5"x20", or Big Blue housing.
- Use tools like a filter wrench, towels, spare O-rings, and food-grade silicone grease during replacement to prevent leaks and damage.
- Check system performance via TDS testing, flow rate, and tank pressure to identify whether filters or membrane need immediate replacement.
- Most under-sink RO filter swaps are DIY-friendly and can be completed in about 20 to 30 minutes, unless water chemistry issues suggest professional help is necessary.
Table of Contents
- What you need for an RO filter replacement
- When should you replace each RO stage?
- How do you replace RO filters step by step?
- Sanitizing your RO system and annual upkeep
- Checking your work: TDS, flow, and tank pressure
- What does RO filter replacement cost per year?
- When testing beats guessing on replacement schedules
- DIY or call a technician? An honest read
- Ordering the right RO filter replacement parts
- Sources
- FAQ
What you need for an RO filter replacement
Before you order anything, look at the label on your existing housings or the system’s spec sheet. Most manufacturers print the cartridge size right on the filter itself, and matching that number matters more than matching the brand name.
Under-sink reverse osmosis systems use a handful of standard sizes, and knowing which one you have saved a return shipment:
- 2.5" x 10" — the most common sump cartridge size for sediment and carbon stages in compact under-sink units
- 2.5" x 20" — a taller version used in systems with more filter capacity or fewer stages
- 4.5" x 10" (Big Blue) — larger housings typically found on whole-home pre-filtration ahead of an RO unit, not usually under the sink
- Inline cartridges — quick-connect capsule filters that snap into tubing without a separate housing, common on newer compact systems
Gather your tools before you start: a filter housing wrench (most systems ship with one, but a strap wrench works if yours is missing), old towels, a TDS meter, spare O-rings, and food-grade silicone grease. That grease is easy to skip and it’s the reason housings crack or won’t seal properly a year later.
Pro Tip: Take a photo of your old cartridge next to a tape measure before you toss it. If the replacement doesn’t arrive for a week, you’ll still remember the exact diameter and length instead of guessing from memory.
Run through this before checkout: confirm cartridge diameter and length, check whether your system uses sump or inline format, verify the membrane’s GPD rating (gallons per day), and note if any stage uses a quick-connect fitting instead of a threaded housing.
When should you replace each RO stage?
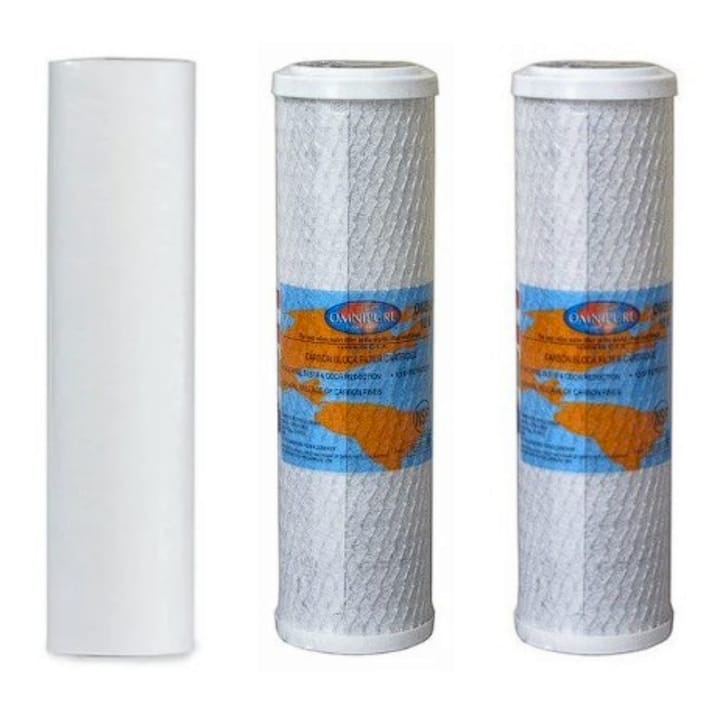
Sediment and carbon pre-filters generally need replacement every 6 to 12 months, the post-carbon polishing filter usually lasts about a year, and the membrane itself typically runs 24 to 36 months before performance drops. Well water changes that math. Higher sediment loads, iron, or hydrogen sulfide can cut those intervals in half, and a household running the tap constantly for cooking or a large family will burn through pre-filters faster than the calendar suggests.
Watch for these signs that a stage has failed before its scheduled date:
- Off taste or plastic smell usually points to a spent carbon pre-filter or post-filter, not the membrane
- Slow flow at the faucet often means a clogged sediment filter restricting water into the system
- Longer tank refill time can indicate a failing membrane or a pressure problem in the tank itself
- Rising TDS reading at the faucet is the clearest sign the membrane has stopped rejecting dissolved solids properly
If you’re not sure which filter is the culprit, work backwards through the system. Taste and odour issues usually trace to carbon. Flow problems usually trace to sediment. A creeping TDS number, on the other hand, almost always means the membrane needs attention, not the cheaper upstream stages.
Missed pre-filter changes are the single biggest cause of premature membrane failure. A $15 carbon cartridge left in service too long lets chlorine and sediment reach the membrane, and chlorine exposure degrades the thin-film membrane material permanently. Swapping the pre-filter on schedule is the cheapest insurance you can buy for a $60 to $100 membrane.
How do you replace RO filters step by step?
This sequence works for nearly every under-sink RO system on the market, whether you’re changing a sediment cartridge or the membrane itself. Set aside 30 to 45 minutes for a full multi-stage change, including cleanup.
- Shut off the feed water valve at the cold water line feeding the RO system, then close the valve on the storage tank.
- Open the faucet at the sink and let it run until water stops flowing. This depressurizes the system so you’re not fighting water pressure when you crack open a housing.
- Place towels under the unit. Even a depressurized system holds residual water in the housings, and it will spill when you open them.
- Unscrew the first housing with the filter wrench, turning counterclockwise. If a housing won’t budge, don’t force it. A short burst of warm water on the housing wall can loosen a stuck O-ring seal.
- Remove the old cartridge and inspect the housing interior for slime, discolouration, or grit. A quick rinse with clean water at this point prevents contaminating the new filter.
- Check the O-ring. If it’s flattened, cracked, or stiff, replace it. Coat the new or existing O-ring lightly with food-grade silicone grease before reassembly. This single step prevents most leak call-backs.
- Insert the new cartridge, matching the flow direction arrow printed on the filter body to the arrow on the housing.
- Hand-tighten the housing, then give it a quarter turn with the wrench. Overtightening cracks housings; it doesn’t improve the seal.
- Repeat for each additional stage you’re replacing, working in order from sediment to carbon to membrane if you’re doing a full change.
- For the membrane specifically, disconnect the quick-connect tubing at both ends of the membrane housing, slide the old membrane out, and push the new one in fully until it seats. Reconnect the tubing lines exactly as they were.
- Open the feed valve and the tank valve, then check every housing and connection point for drips over the next few minutes before walking away.
- Flush the system. Let the RO unit run and discard the first full tank of water. Don’t drink it. The first tank carries carbon fines and air from the new filters, and flushing it clears both.
Pro Tip: Keep a small tray or bin under the housings the first time you run the system after a swap. A slow drip from a slightly misaligned O-ring is easy to miss on a wet countertop but obvious in a dry bin.
Expect the whole job to take approximately 30 minutes or less for pre- and post-filters alone, and somewhat longer if you’re also swapping the membrane and performing checks.
Sanitizing your RO system and annual upkeep
Sanitize the system once a year, timed to coincide with your full filter change while the housings are already open and empty. This single habit prevents the slow biofilm buildup that causes musty odours and inconsistent taste, a problem most manufacturer maintenance guides flag as a routine annual task rather than an emergency fix.
A basic sanitization pass looks like this:
- Remove all filter cartridges (leave the membrane out of contact with bleach; sanitize around it, not through it, unless your manufacturer specifically approves bleach contact with that membrane)
- Mix an approved food-grade sanitizer, or a small measured amount of unscented household bleach per your system’s manual, and pour it into the empty housings
- Reassemble without new filters installed yet, run the sanitizer solution through the system, then drain and flush thoroughly with clean water before installing fresh cartridges
- Check the storage tank’s air pressure with a standard tire gauge at the Schrader valve; an empty tank should read close to 7 to 8 PSI
- Inspect visible tubing for kinks, discolouration, or brittleness, and check valve handles for smooth operation
If odours or taste problems persist after sanitizing and a full filter change, the issue likely sits upstream of the RO unit. Check your home’s incoming water quality before assuming the RO system itself is at fault.
Checking your work: TDS, flow, and tank pressure
A handheld TDS meter is the fastest way to confirm a filter swap actually fixed the problem. Test the feed water going into the system, then test the water coming out of the RO faucet, and calculate the percentage rejected.
Here’s what those numbers should tell you:
- Rejection above 90% is a healthy membrane doing its job properly
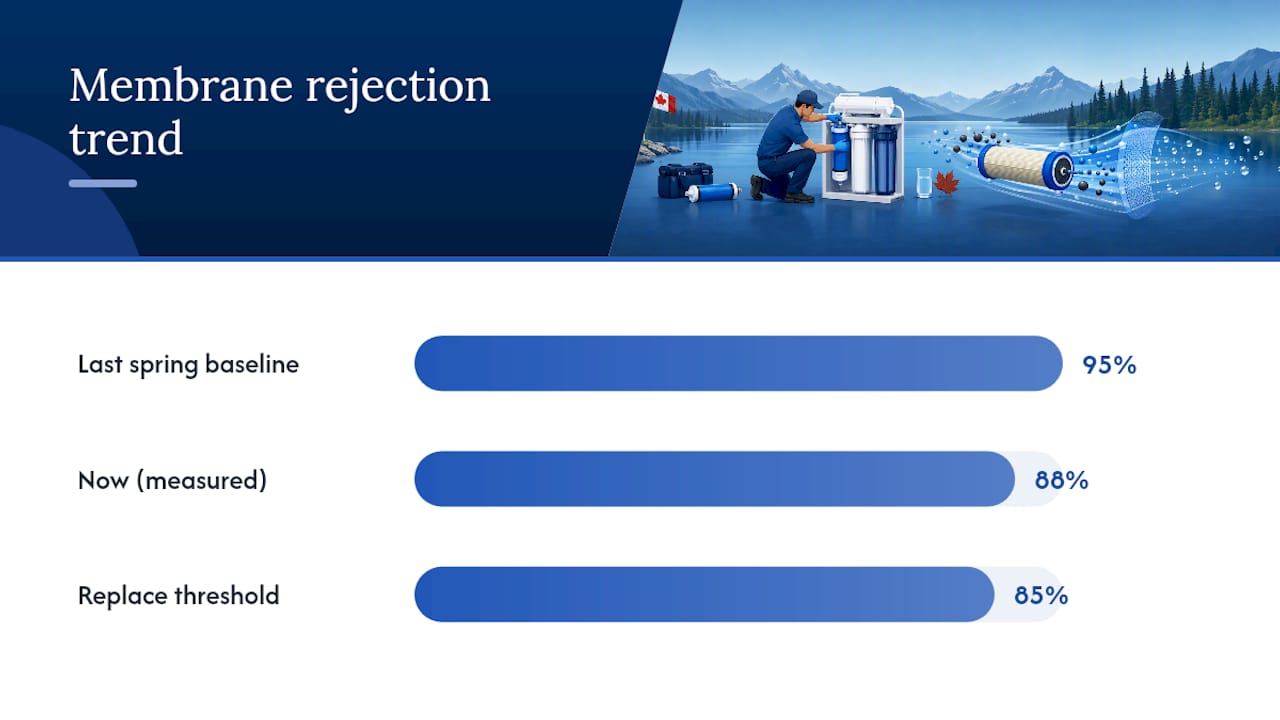
- Rejection falling below 85% signals the membrane needs replacing, even if it hasn’t hit the 24 to 36 month mark yet
- RO output TDS above 20 ppm on municipal water, or noticeably elevated compared to your baseline, points to the same conclusion
- Tank fill time longer than 2 to 4 hours after a full draw usually means low tank pressure or a pre-filter restricting flow, not the membrane
Work through diagnostics in order rather than jumping straight to the most expensive part. Check pre-filters first, since a clogged sediment cartridge mimics membrane failure by slowing everything down. Then check tank air pressure, since a flat tank makes the whole system feel sluggish even with a perfect membrane. Only after ruling both out should you suspect the membrane itself.
Keeping a small log of TDS readings and fill times over the year gives you an early warning system. A membrane that rejected 95% last spring and reads 88% now is telling you something well before it fails outright.
What does RO filter replacement cost per year?
Budget roughly $50 to $100 per year for pre- and post-filter replacements on a standard under-sink system, with membrane replacement adding another $40 to $100 amortized across the 2 to 3 years it typically lasts. Averaged out, most households spend somewhere between $70 and $130 annually once you fold in the membrane’s share.
Buying a full replacement pack versus individual cartridges comes down to how you use your system:
- Filter packs bundle every stage you’ll need for a scheduled change into one order, which suits anyone who wants to replace everything at once and skip separate purchases
- Staged individual purchases can save money long-term if your pre-filters wear out faster than your post-filter, letting you replace only what’s actually spent
- Membranes are almost always bought separately from pre-filter packs since they’re swapped far less often
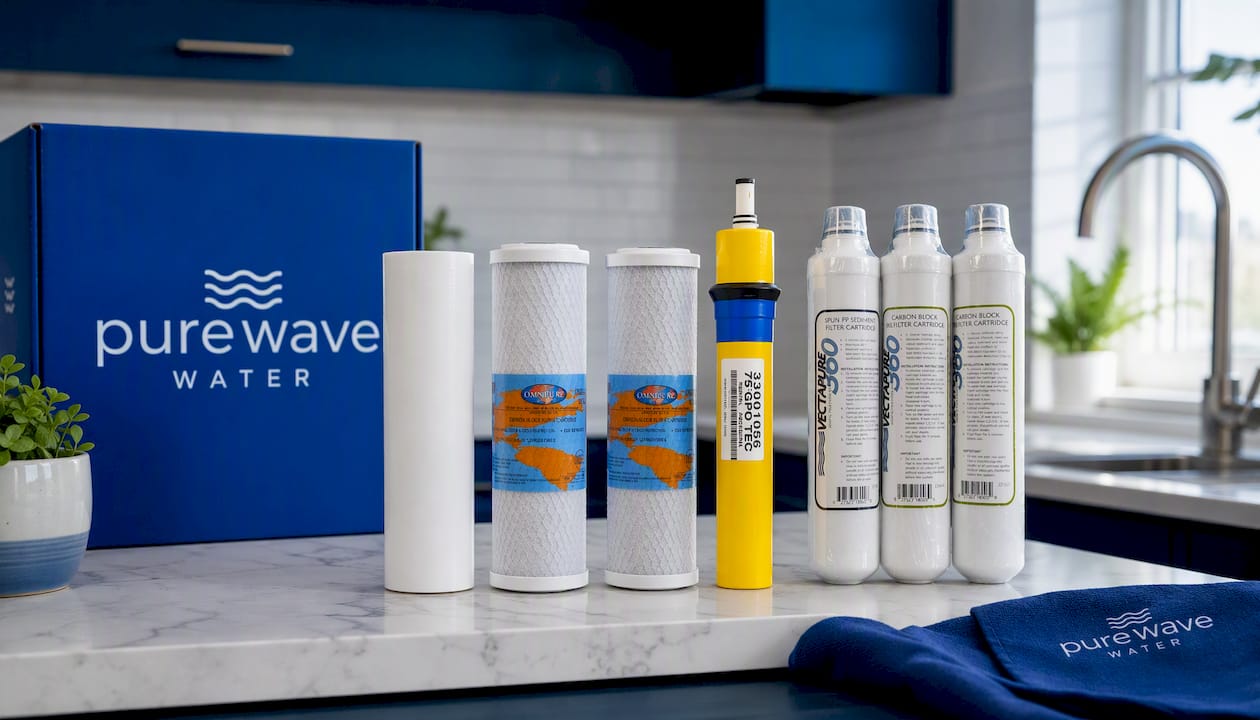
Pure Wave Water carries the Reverse Osmosis 3 Pack Filters for a standard sediment, carbon, and post-filter change in one order, the Hydrotech R/O Membrane, 75GPD for the most common under-sink membrane rating, and the Vectapure 360 Reverse Osmosis Filter Pack as a full multi-stage alternative for systems using that format.
Whichever route you take, confirm cartridge dimensions against your existing housings, check for NSF certification where relevant, and review the seller’s return policy before ordering. Compatibility filters listed on retail replacement pages usually list system compatibility by brand and model, which is worth checking twice before you buy.
When testing beats guessing on replacement schedules
A calendar reminder gets most households close to the right replacement schedule, but your actual water is what determines the real interval. Free in-store water testing for hardness, iron, and other quality concerns is sometimes offered, and such tests can change the recommended replacement schedule entirely.
Well water carrying elevated iron or hydrogen sulfide (the rotten-egg smell) shortens filter life dramatically, and in those cases, an upstream iron removal step is often the real fix rather than swapping pre-filters more often. If you’re replacing your sediment filter every three months instead of the usual six to twelve, that’s a signal worth investigating rather than just budgeting for, since iron above a few parts per million typically calls for pre-treatment ahead of the RO system, not just a faster filter change habit.
A technician visit is worth booking when you’ve replaced a membrane twice in under two years, when your water tests show high iron or sulfide, or when taste and odour problems persist after a full sanitization. Pure Wave Water’s local service and product catalogue cover water softeners, UV purification, whole-home filtration, and RO systems alongside the testing, replacement filters, cartridges, and membranes homeowners buy on their own.
DIY or call a technician? An honest read
Under-sink RO filter swaps are genuinely DIY-friendly for the vast majority of homeowners. The steps are mechanical, the tools are cheap, and the failure modes are forgiving. Where I’d draw the line: repeated membrane failure inside of two years, unexplained TDS creep after a proper change, or any well water source with iron or sulfide in the mix. Those aren’t filter problems. They’re water chemistry problems that a fresh cartridge won’t solve.
Test before you replace, not after. A TDS reading and a hardness test tell you whether you’re actually fixing the cause or just resetting the clock on the same failure. That’s the gap between doing maintenance and doing detective work.
— CloudSprout16
Ordering the right RO filter replacement parts
Pure Wave Water is the direct source for the exact parts covered above, without the trial and error of matching part numbers across third-party retail listings. The Reverse Osmosis 3 Pack Filters cover a standard sediment, carbon, and post-filter change in one order. The Hydrotech R/O Membrane, 75GPD fits the most common under-sink membrane rating in Canadian homes. The Vectapure 360 Reverse Osmosis Filter Pack covers systems built around that format.
If you’d rather not measure housings and cross-reference cartridge sizes yourself, Pure Wave Water’s technicians can install a full replacement set correctly the first time, and the free in-store water test tells you whether your schedule should be faster than the calendar suggests. Browse the full replacement parts catalogue to match your system, or book an in-store test and installation through Purewavewater to get your exact replacement schedule confirmed before you buy anything.
Sources
- RO Filter Replacement Schedule: Complete Guide
- Reverse Osmosis Maintenance: Schedule & Costs (2026) – Mid Atlantic Water
- How to Replace RO Filters: Step-by-Step Maintenance Guide
FAQ
How often should RO filters be changed?
Sediment and carbon pre-filters typically need replacing every 6 to 12 months, the post-filter annually, and the membrane every 24 to 36 months. Well water with iron or sulfide can shorten all three intervals.
Can you change RO filters yourself?
Yes. Most under-sink systems allow a 20 to 30 minute DIY swap using a filter wrench, towels, and spare O-rings, with no plumber required for pre- and post-filter changes.
Is RO water hard on the kidneys?
No credible evidence supports that claim. Reverse osmosis removes minerals along with contaminants, but healthy people get the bulk of their daily minerals from food, not drinking water, so RO water on its own doesn’t pose a kidney risk for the general population.
How do I know what filters to get for my RO system?
Check the size printed on your existing cartridge or your system’s manual, since most under-sink systems use 2.5" x 10" or 2.5" x 20" sump cartridges or inline capsules. Pure Wave Water’s in-store testing and product catalogue can also confirm the exact match for your system.

Written by the Pure Wave Water team, who test, install and service water treatment systems across Georgetown and Halton Hills.